How to make cabinet doors
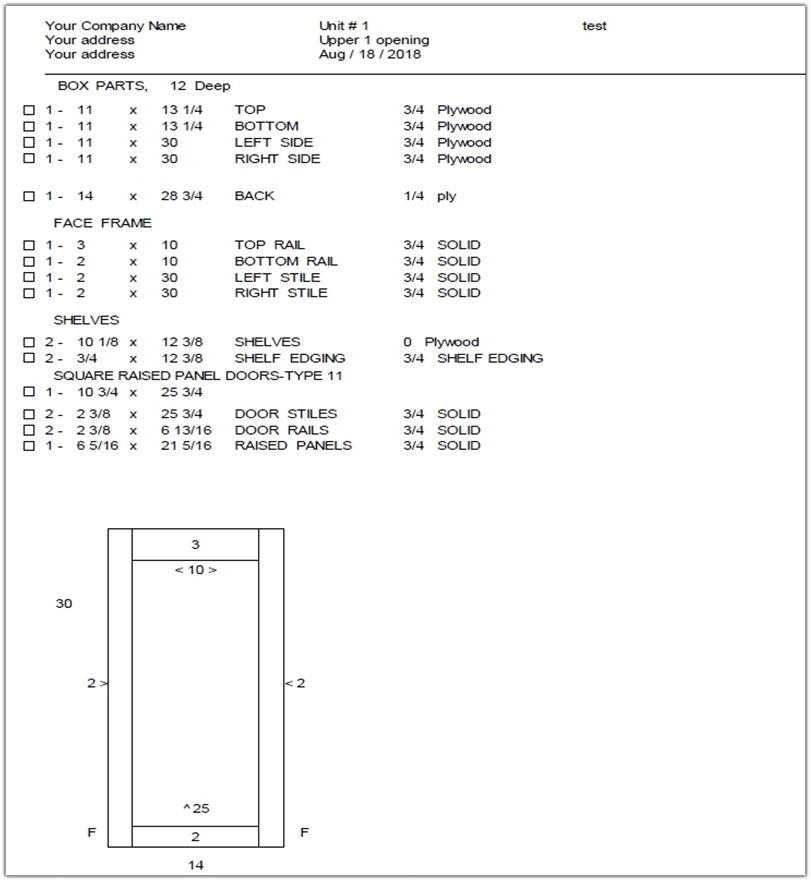
The door for this cabinet needs two 2 3/8” x 25 3/4” stiles, two 2 3/8” x 6 13/16” top & bottom rails and a 6 5/16” x 21 5/16 panel.
Copyright 2005-2026 Cabinet Planner LLC
Start by cutting and gluing up the pieces for the raised panel, if needed. Some will say you shouldn’t make your panels out of any single piece wider than x”. This isn’t necessarily true. If the lumber has been properly kiln dried it will not warp or crack. Either way, if you need to glue them, do it first so they have time to dry while you are working on the door frame parts. If you will be running the glued up panels through a planer to clean them up, make sure you don’t glue any panels wider than your planer.
Next cut your stock for the stiles & rail. Here to there is some disagreement on the size you should cut their width. Some like to cut to exact size and some like to go about 1/16” over so they have a bit to shave off while routering them. Either method will work. For most overlay applications being even 1/8” undersized the doors will still look fine when installed.
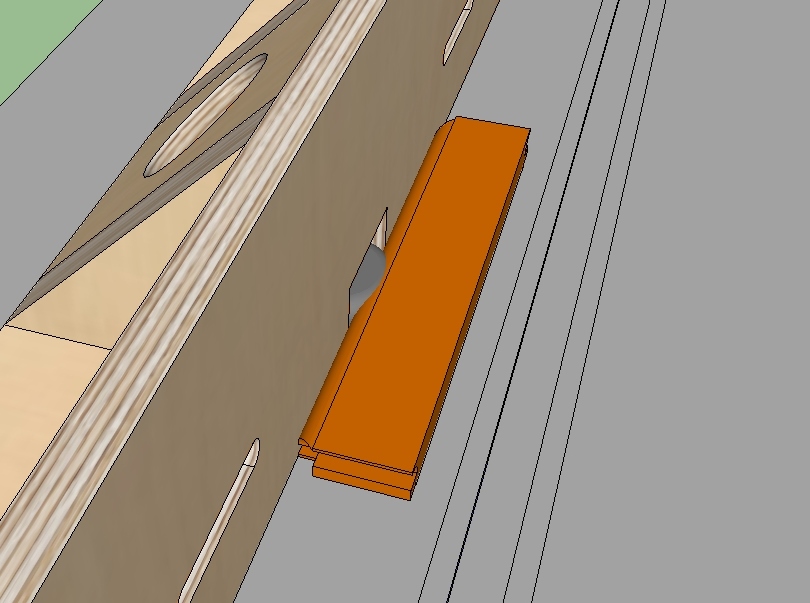
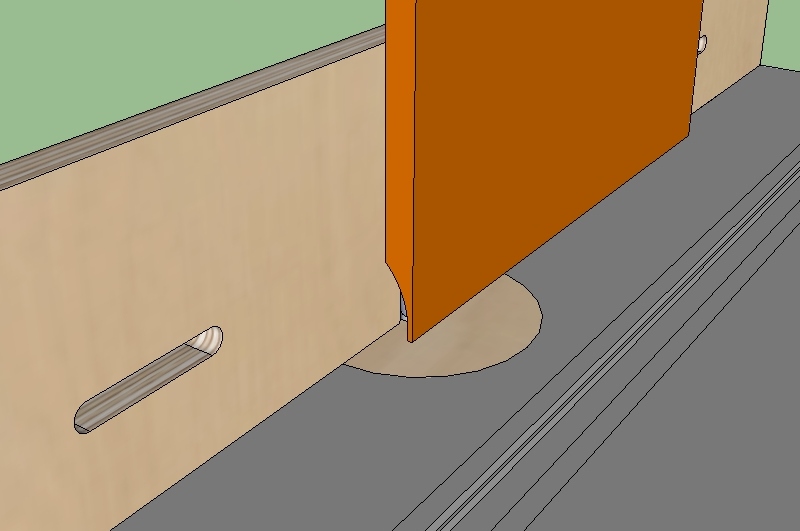
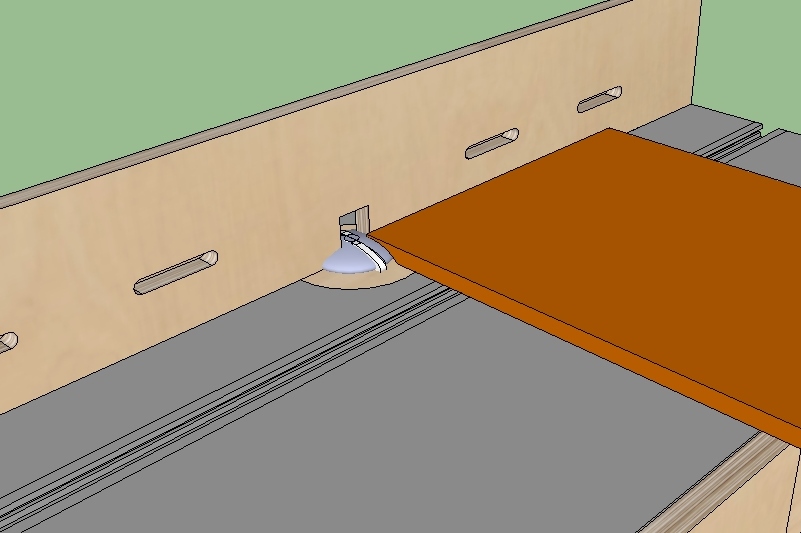
Using your router table or shaper, cut the end copes on the top and bottom rails. You MUST use a T-square, preferably along with a lever-clamp, to hold the piece while running it.
Using your router table or shaper, cut the end copes on the top and bottom rails. You MUST use a T-square, preferably along with a lever-clamp, to hold the piece while running it.
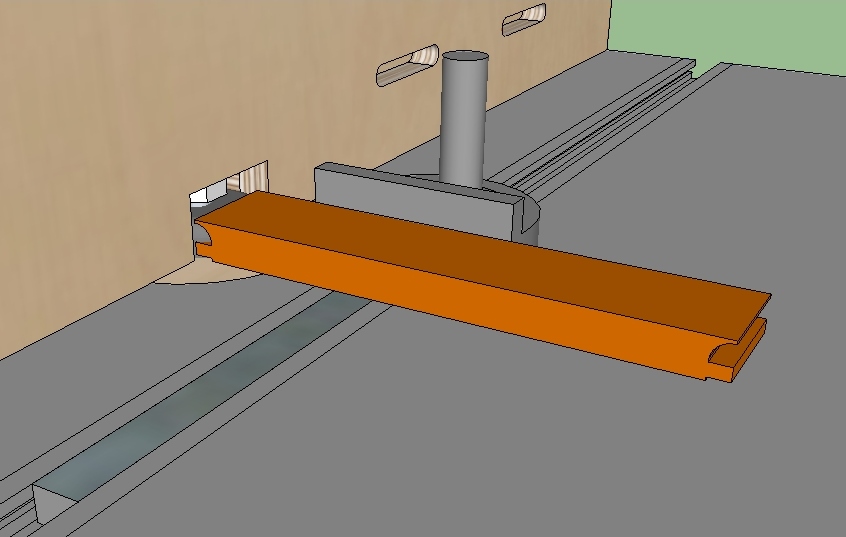
After the ends of the tops & rails are done switch to the other cutter and run the inside edge of the rails and the stiles. These should be run through with a power feed. It is very difficult (and dangerous) to run them by hand and get a good finish. You will need to pause and re-adjust your grip on the piece which will cause the bit to create a burnt spot.
Now clean up the glue on your panels and plane them if needed and then cut them to size. With a shaper or router table you can use a vertical panel cutter. If you are using a horizontal cutter you pretty much need to use a shaper as routers aren’t usually powerful enough for them. You need to cut the ends first as there will be some amount of tear out, when you run the side grain this tear out is generally removed.
After machining everything, give the inner edge of the stile and rails a good sanding to remove any chatter marks. Then sand the profile on the panel. Before assembling your doors it is a good idea to stain the very edge of the panel where it slides into the groove. This will prevent seeing an unstained line as the panel shrinks due to normal seasonal movements.
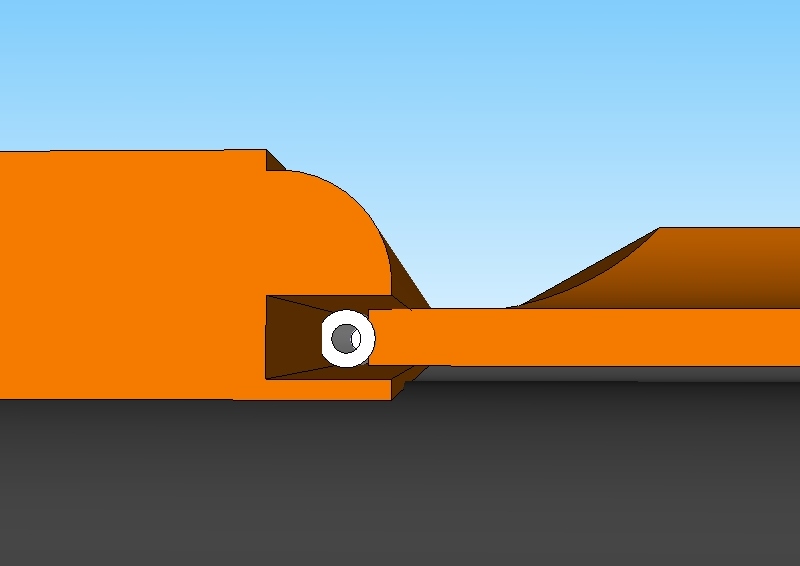
When assembling the doors you should use spacers around the panel. There are special “space balls” made for this or you can pick up some 1/4” silicone airline from a local pet supply store. This will help keep the panel centered and prevent any rattling when the door is closed.
When assembling the doors you should use spacers around the panel. There are special “space balls” made for this or you can pick up some 1/4” silicone airline from a local pet supply store. This will help keep the panel centered and prevent any rattling when the door is closed.
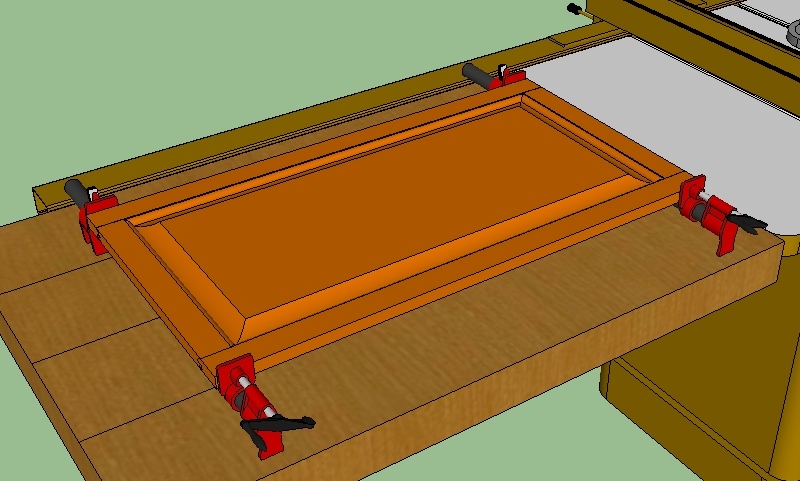
Apply a good amount of glue to the outer 3/4 of the rails, staying away from the panel so it isn’t glue in place and not allowed to float around as the seasons change. Then clamp them up and allow to dry for at least an hour before unclamping. Some cabinet makers will shoot some short nail in through the back to nail the stiles & rails together so they can unclamp them sooner.
After the doors have dried and are unclamped you can remove any excess glue with a paint scraper. Then sand with 120 grit and follow that with 220 grit. If you will be routing a decorative edge you should do that after the rough sanding and before the final sanding. Also, if you are using concealed hinges you should drill the holes for them before your finish sanding as well.